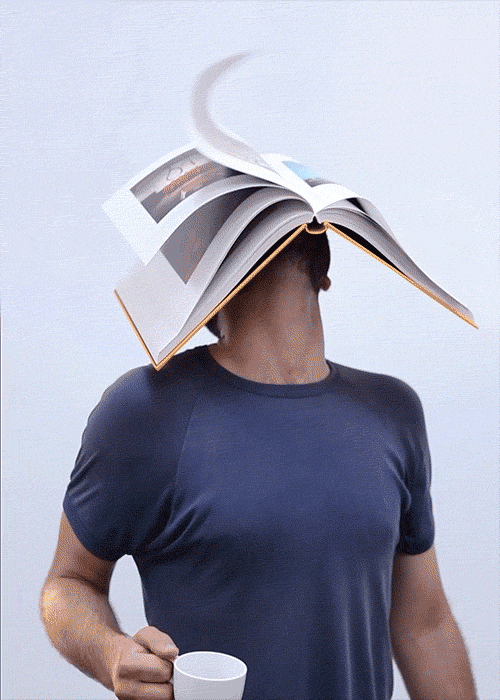
mind map on movement
this mind map is what link with movement as a photography topic and what compositions i think that there are with idea of movement whether thats people, objects, contrast and levitation
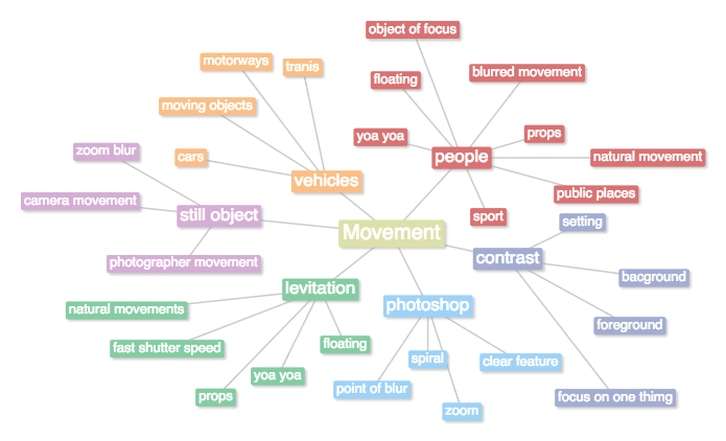
yowa yowa

yowa yowa is a photographer who specializes in levitation she is on my page because one of my faviourite in levitation and inspired my pictures. she creates the levitation photos through fast shutter speed to correctly capture a image which looks as if she is floating.
in this image of yowa yowa it shows the technique of levitation within a image. i specifically chose this image because it shows the background image to demonstrate a busy ordinary city life where the site of levitation looks ordinary to the people around her . the colour of her clothing very effective as matches the stripes of the train making a association between the two. this technique of levitation is done by having a fast shutter speed and capturing the levitation by taking the picture as she is in the air.
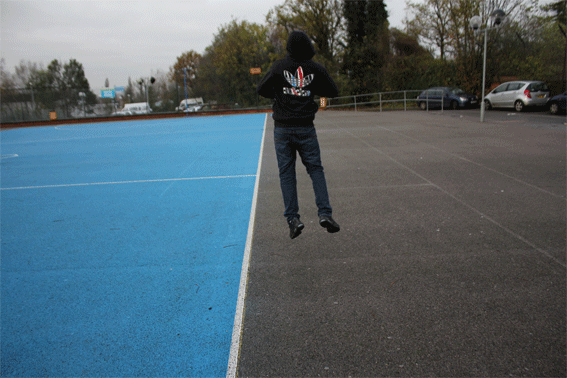
levitation
you may wonder how these fascinating images were created and to make the image seem to be have a object levitating this is how you do it in this video you must click the link to learn how to do levitation in photography https://youtu.be/xaSH0d60Zso
|
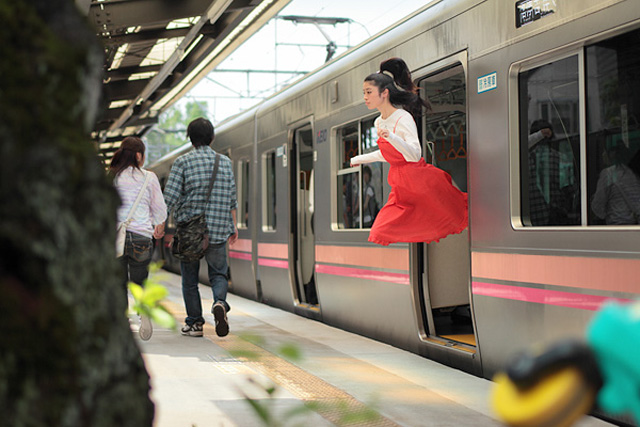
this is done setting the shutter speed to fast shutter speed creating this effect. these images are effective because the multiple coulours and patterns on the umbrella creates a interesting image where the viewer is drawn to the object as the boys are made to look as if they are levitating
|

|
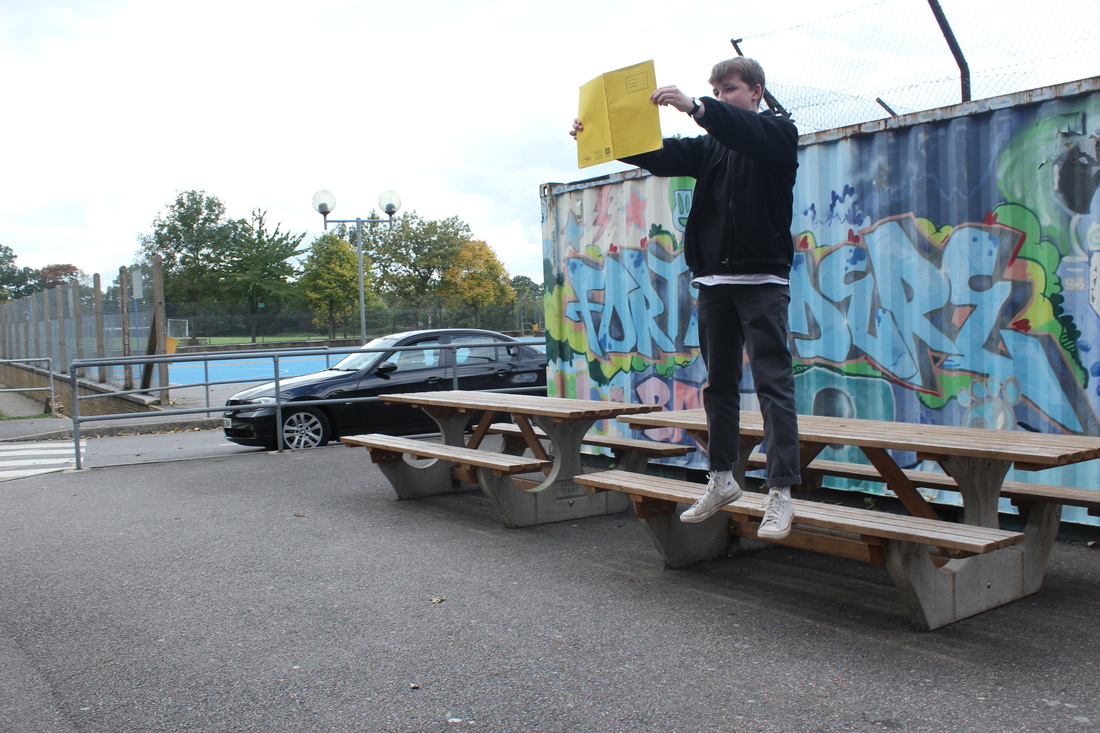
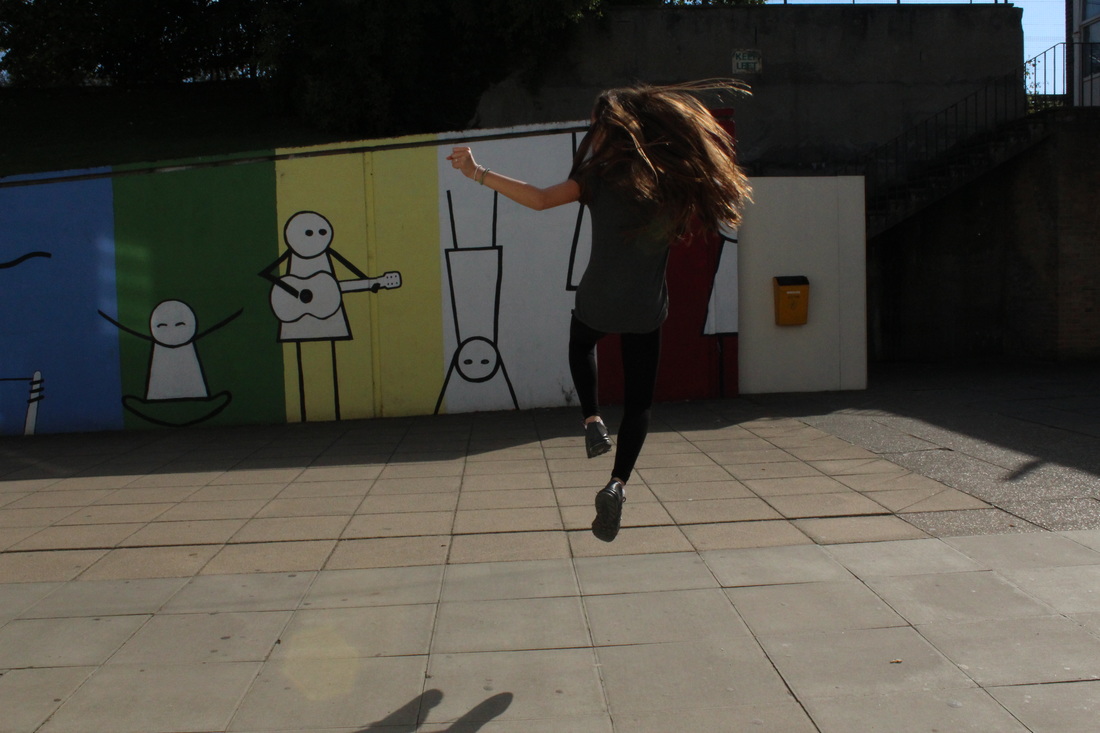
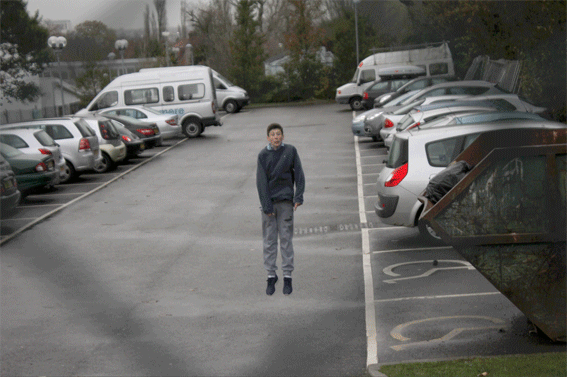
this image is good because i wanted to make a close by object the subject of the image to create a peculiar background. this shown with the bright pink jacket alerting the viewer with the bright colour as she is levitating which creates a unusual image but fascinating image.
|
|
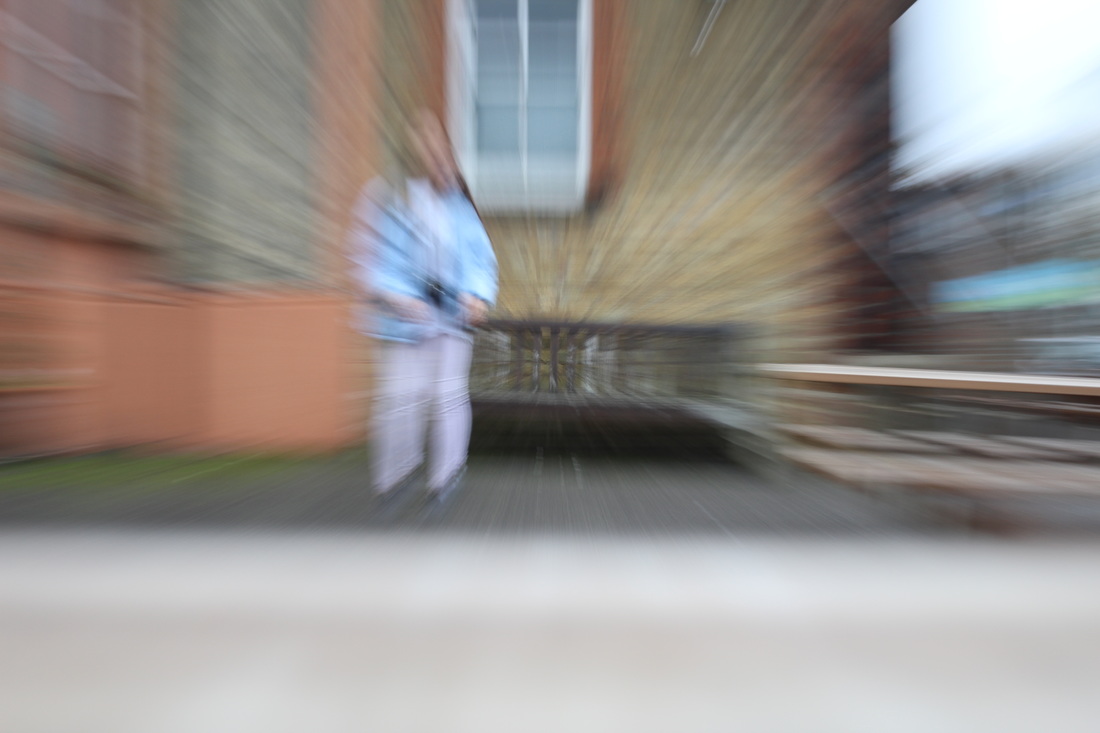
zoom blur
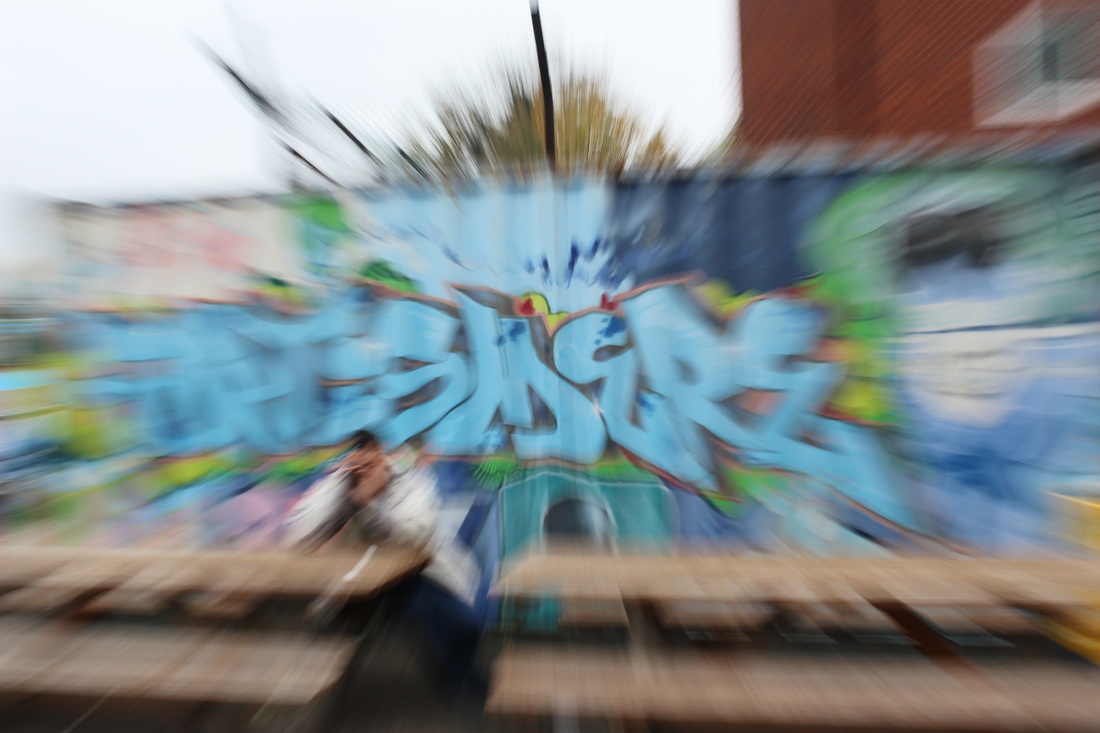
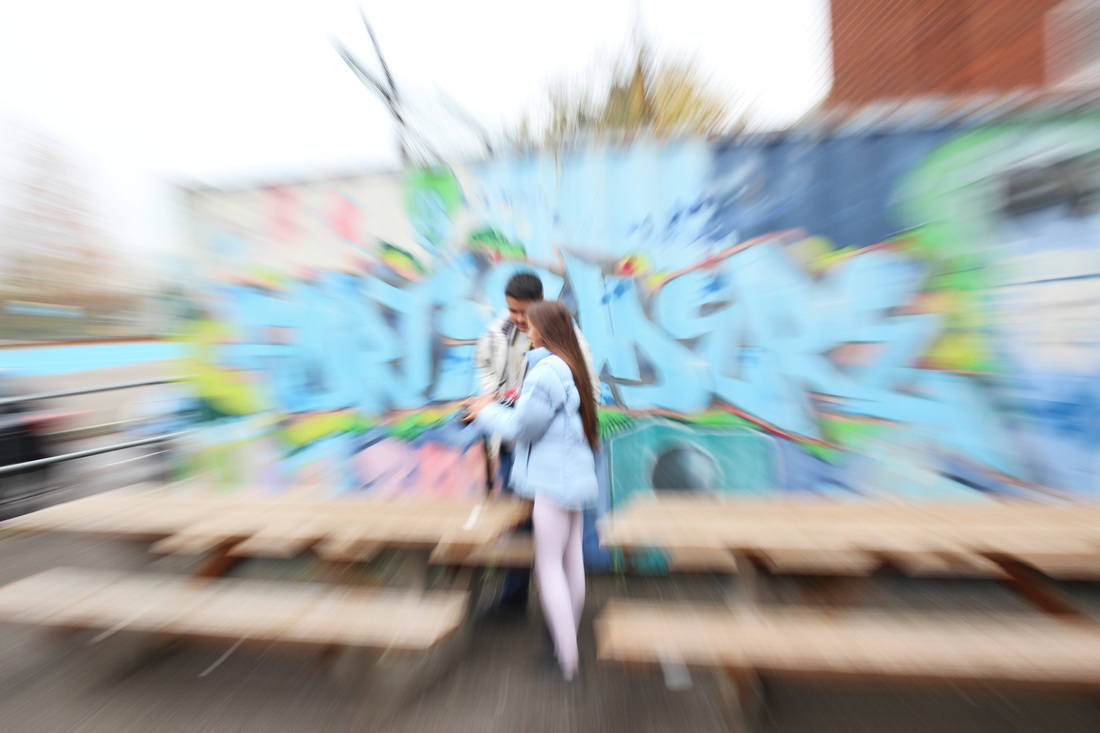
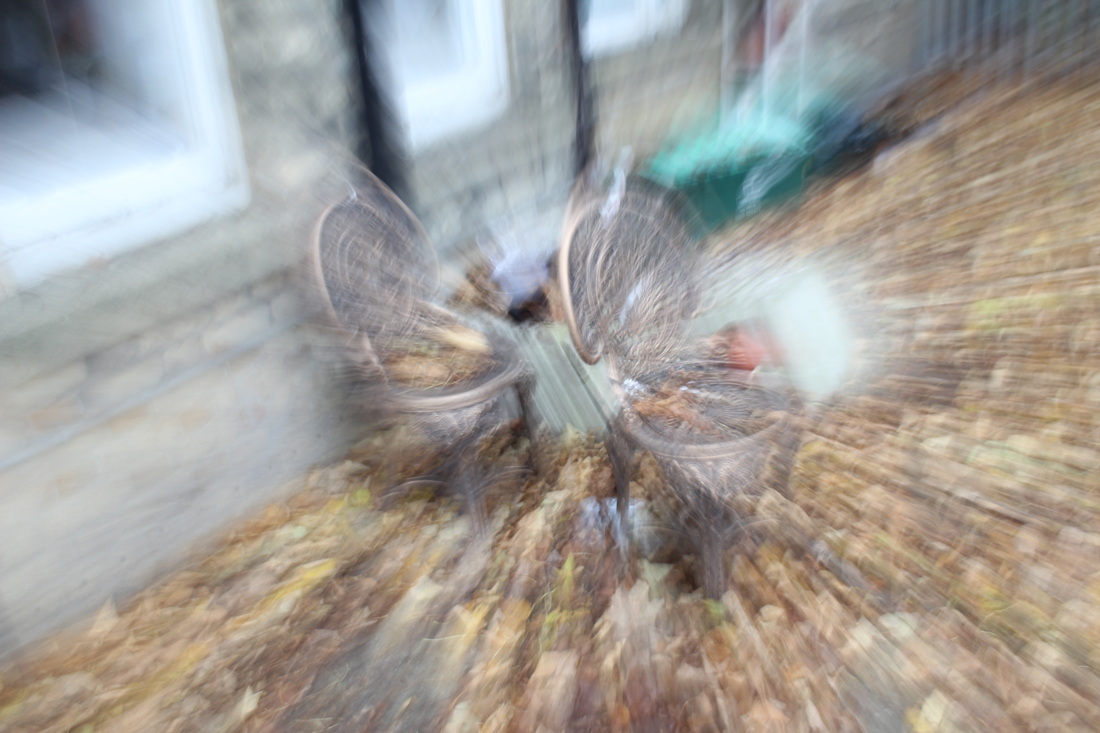
this is done by twisting the lense while taking a picture to create this effect this creates a blurred background which creates harder to identify surroundings and makes viewer focus on the center of the image.
|
|
the diffrent colours in the background create the screen to feel 3d and unreal this is effective because the centre of image begin so stand which also blurs out background so it makes image focus oj the object infront. i achieved this by doing the zoom blur technique which creates a blurred image but also interesting as creates a mood of uncertainty
|

|
|
|
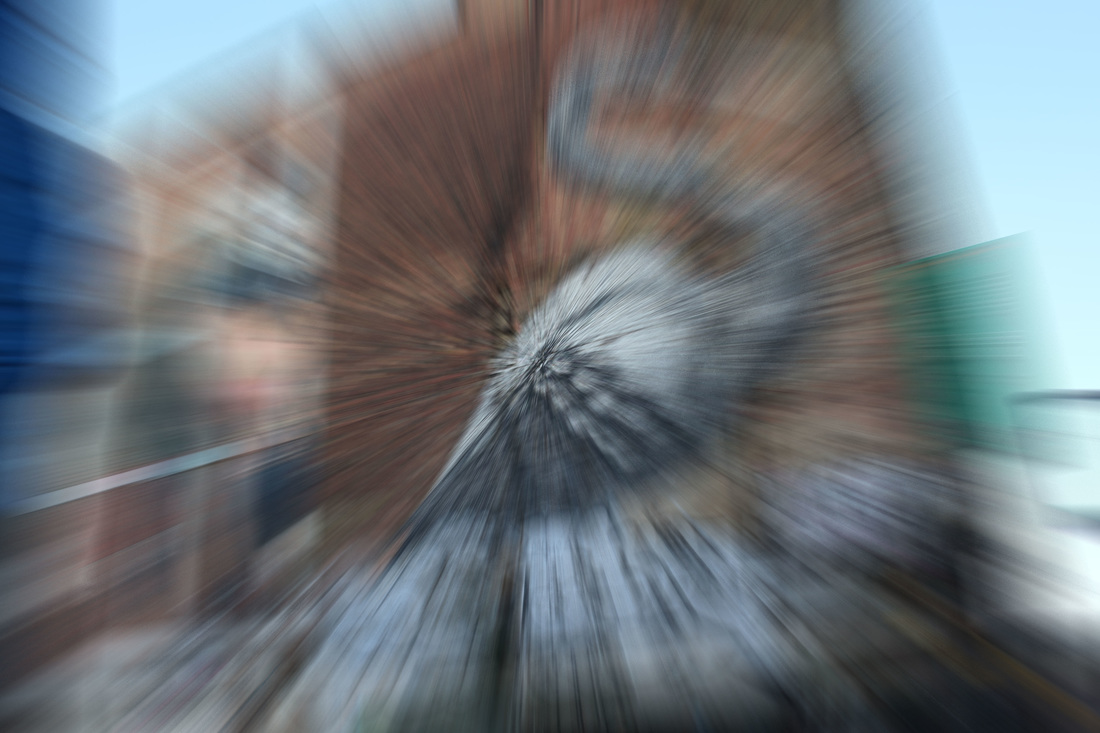
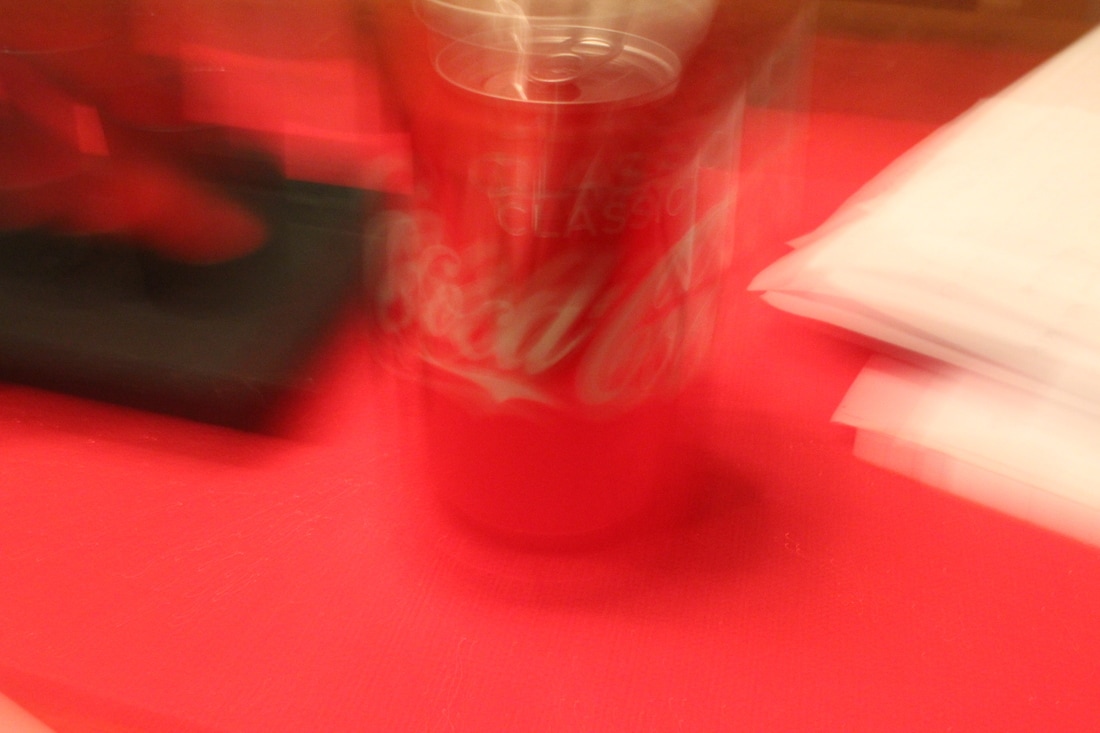
this technique begins to create it hard for the viewer to identify the object or the person which creates a unreal scene. in the final image the brick wall creates interesting patterns and texture.also the image on the right i focused on having very little objects or scenery as i wanted the image to have a main focus on the graffti on the brick wall. furthermore the zoom blur effect emphasizes this as it creates selective focus to draw the viewers attention to the centre where the swan is shown.
2nd response
|
|
|
|
|
|
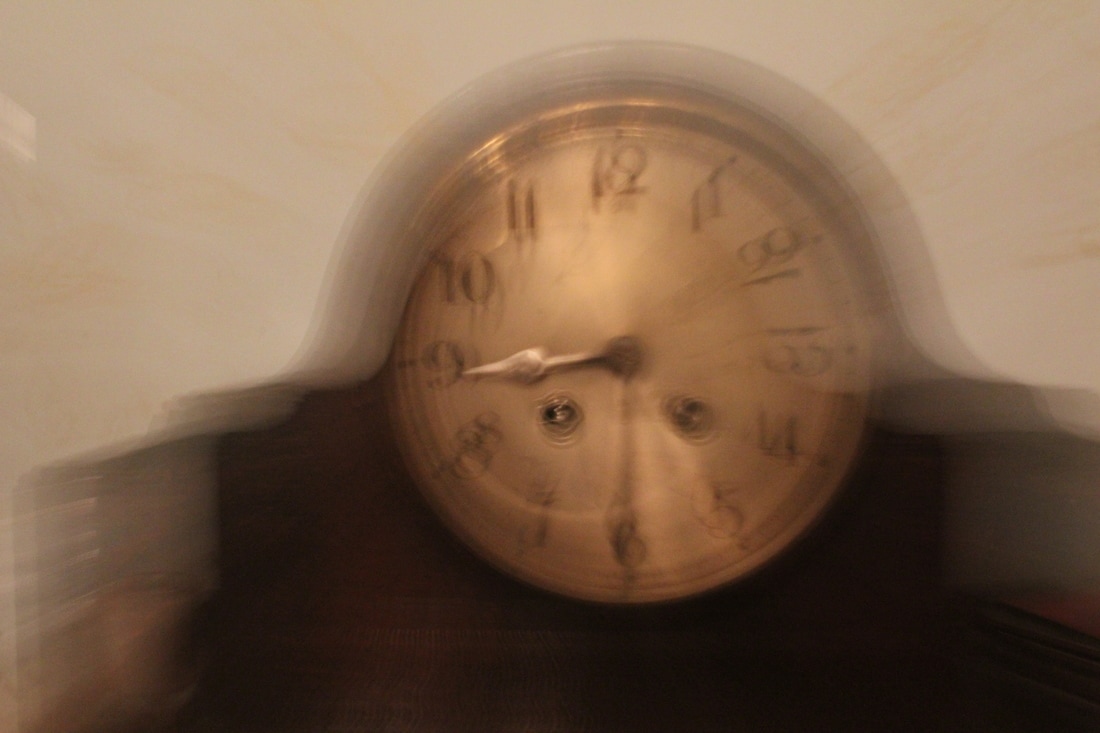
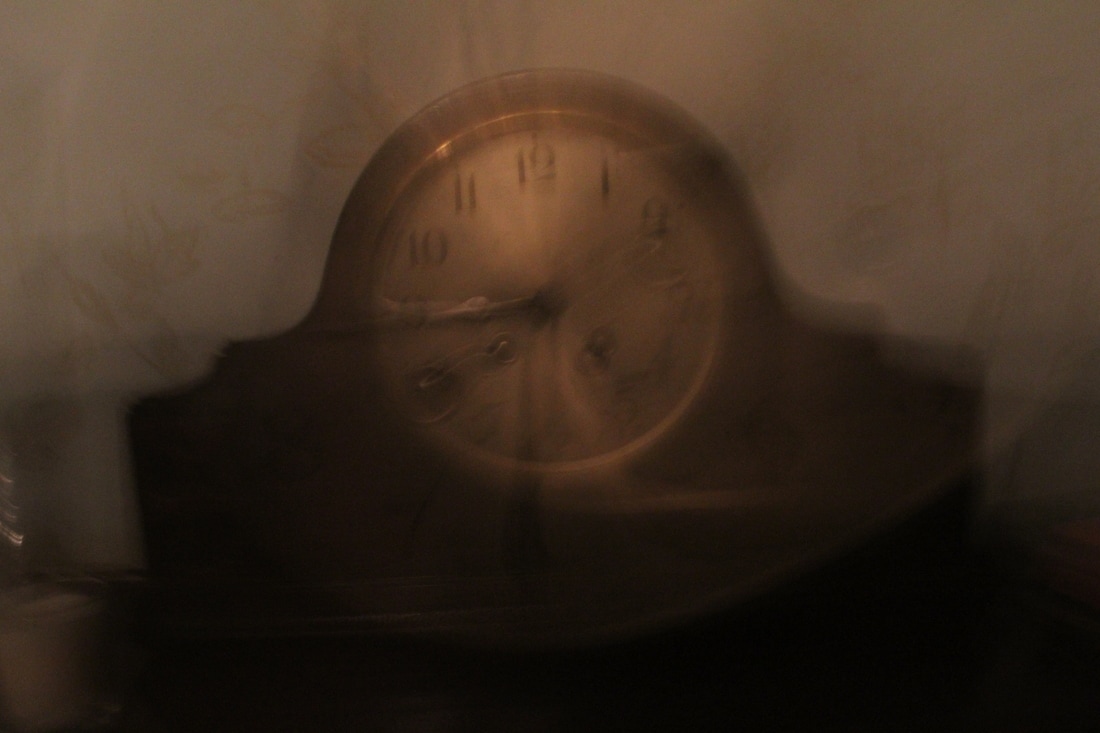
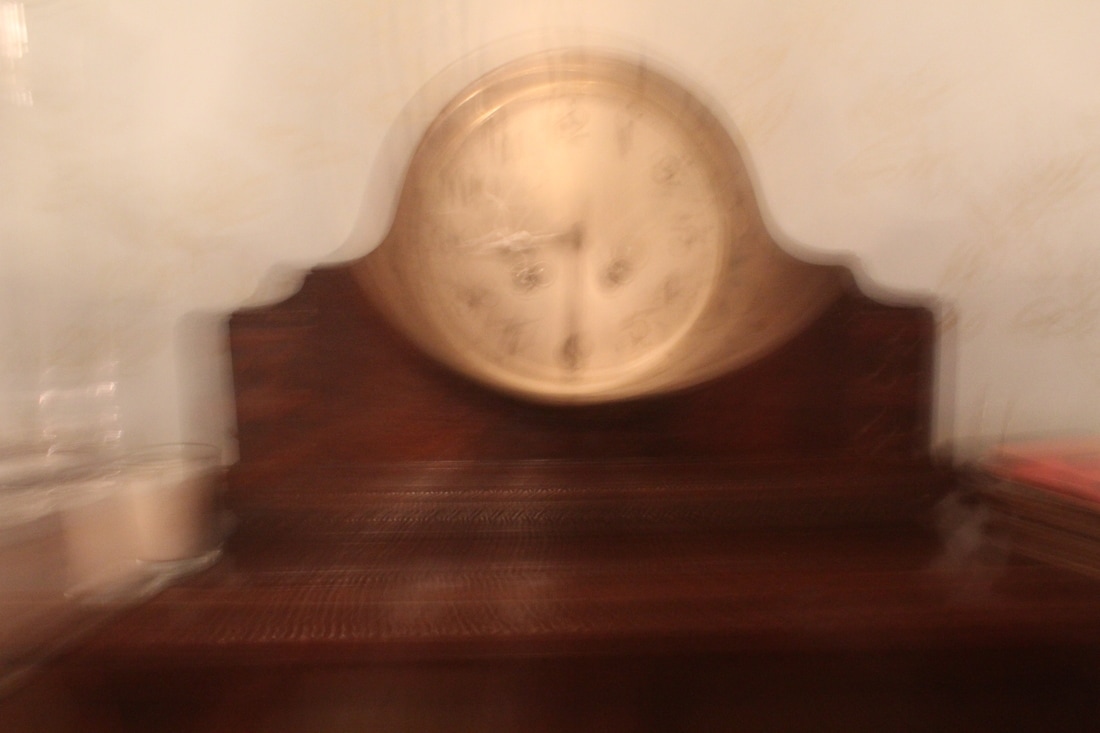
these images demonstrates fascinating ideas as i took picture of the clock to create a zoom blur effect and made as if the clock numbers
|
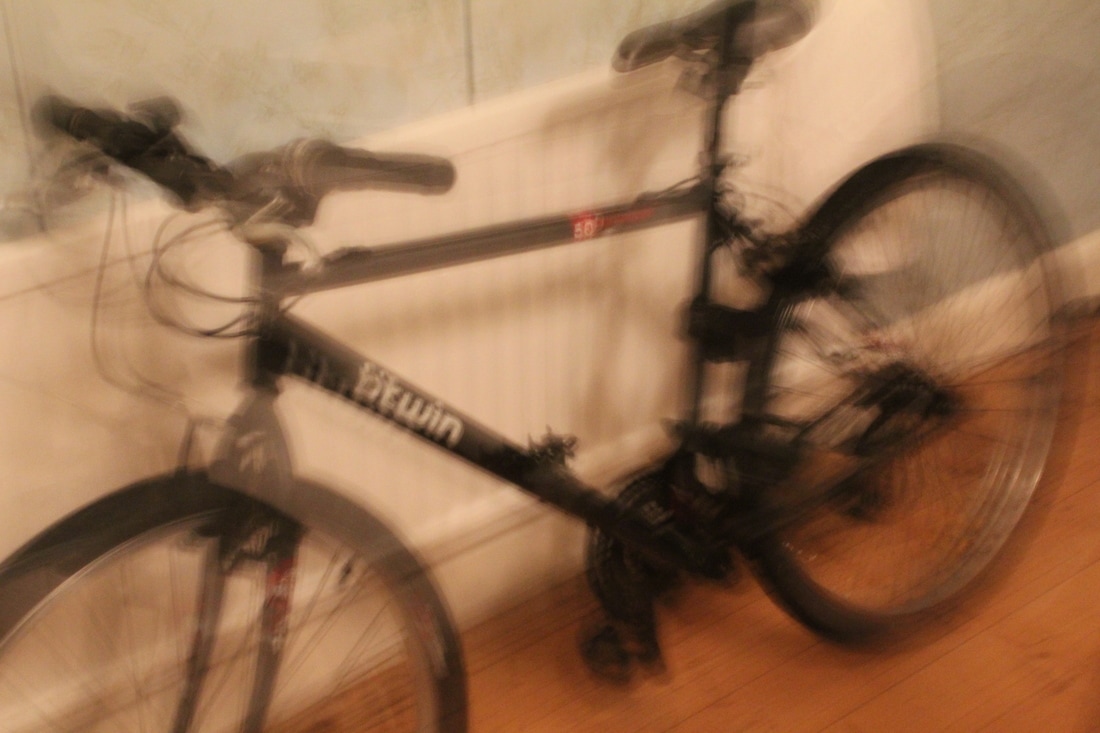
this shows the bike to be zoom blurred as the bike wheel chains make as though the chains are coming out of the bike creating a pleasurable image for the viewer
|
www and EBI
WWW= i had interesting ideas
EBI= I didnt show the perfect technique as it more blurry than zoom blur
EBI= I didnt show the perfect technique as it more blurry than zoom blur
final response
in these images i portray natural nature to be abstract and look as though it is fake or blur out the surroundings this creates a very effective zoom blur image
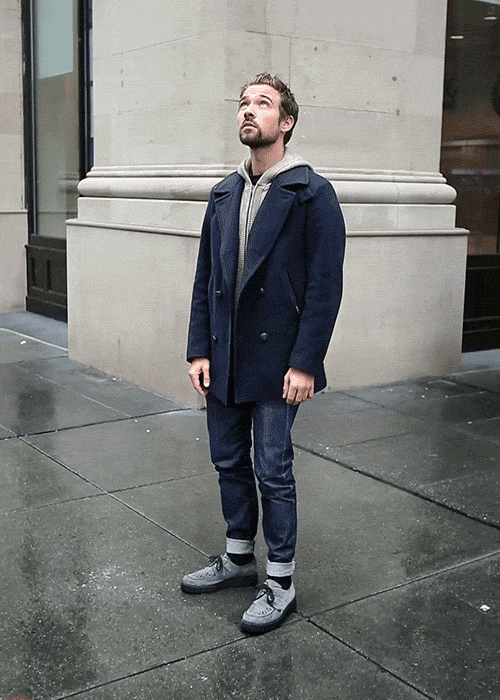
this part has been done with photoshop to make seem a blur zoom when all 3 are the normal one this is compared to the first image whee you can clearly identify his face and the details and as image goes on it becomes harder to identify the details of his face and the face seems as if it has been spreading out and stretched. it also makes a much more inteesting image where it looks as if it is coming out of the screen.

|

|

in this image i use the technique of zoom blur with the use of photoshop this makes the final image more interesting rather than the original which is a bit bland. i wanted the frame to mostly be filled by my friend rather than plenty on background which would create negative space, which would also take away the focus on the center of the image.this zoom blur technique through photoshop which creates a selective focus to draw the viewers attention to the centre of the image. this technique also creates the image to feel as if the photo is stretched where his eyes are the only thing that has much detail.
gif
romain laurent
|
|
in roman laurents images i have chosen these because the images show a unnatural occurrence this creates a very interesting image where he chooses a plain background to emphasize the abstraction with in the images
my response
|
|
.these images are inspired by work of roman laurents work and yowa yowa where i combined the levitation with the unnatural giffs creating a overall abstract images. this was created through taking many different photos and combining them to make one short giff to create a interesting imagery of levitation and roman laurent technique of GIFFS.i also focused on trying to keep the camera still to make it look realistic.
final response
|
|
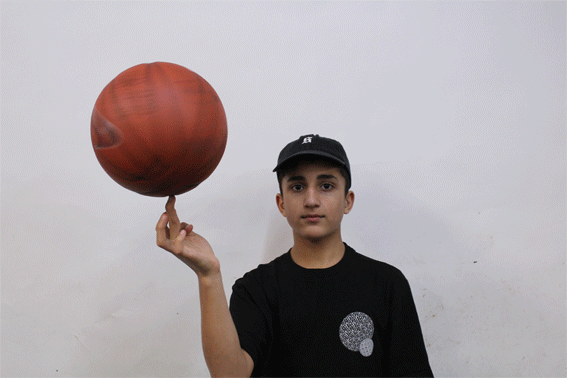
.in these two images i demonstrate the giff image by taking multiple images and combining together to create a unusual image. i wanted to make the movement be the the main focus of the image. i achieved this by using a white background to have no background details so that the ball and the movement is the main focus. Another way i achieved this was by keeping him in the centre of the frame to allow main focus on him and the movement. also i cropped out the negative space due to to much on the edge of the frame. also i wanted to prevent any shaking from the camera which would make it look less realistic so i prevented this by placing the camera on a tripod. i liked this image due to the creation of the giff making it more exciting rather than individual images which would be a bit dull.
light painting
Michael Bossanko
Light painting photographer Michael Bosanko has been capturing light since 2004. He discovered light painting on accident, Michael says this of his moment of discovery, “the moon formed part of the scene, but the camera shake caused the moon to make a streak. My curious mind clipped the camera from the tripod and, hand held, I attempted to “write” my partner’s name using nothing but the moonshine and the movement of the camera in my hand, and I had success. As soon as I returned home, I adopted the same principles but with torches, and I’ve been hooked ever since.” Ever since that moment Michael has had great success with light painting photography, he has created images for several commercial clients and been published in numerous magazines.
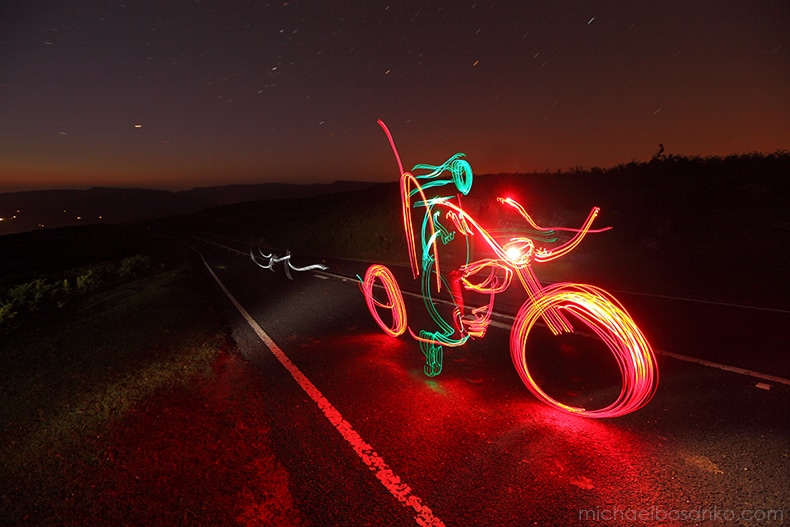
i was very fond of this image because of how Basanko set out the image where the focus is on the light painting of the bicycle. also it it very beautiful image because of how he set the image infront of a blue and red sky( showing sunrise ) which also accompanies the choice of the light painting matching the sky line of blue and red.
|
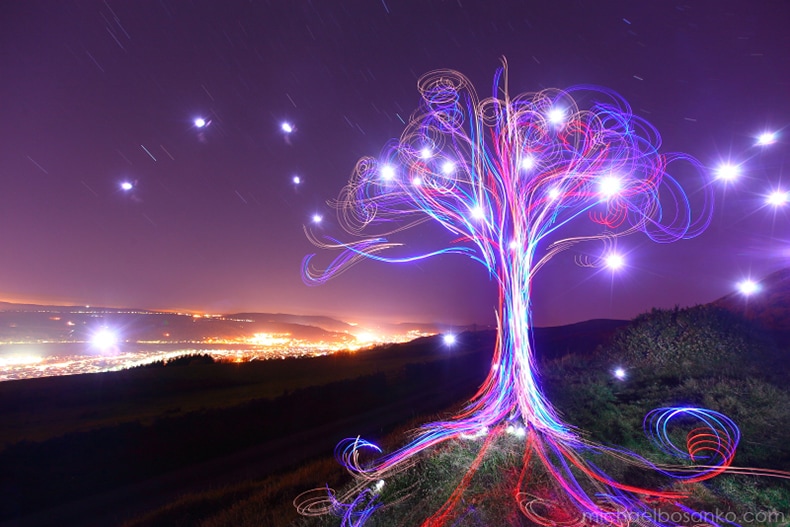
another image where Basanko demonstrates the beuty of the scenary. this creates a hi key mood with the vibrant colours continuing to copy the colour of the sky line with the purple and orange light painting colours. also the choice of light painting a tree highlights how nature is a big focus of Basanko. furthermore due to the beautiful sky line he makes sure to keep a wide frame to capture the scenary in the high view that he is in.
|
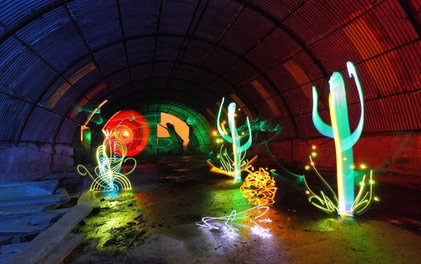
in this image of Basanko he demonstrates the technique with many more colours than than the other two . this is because i believe due to very little background details this allows the viewer to have the main focus on the light paintings rather than the background. there is a large depth of field this is to allow the image to have alot of detail where all 3 of the light painting are sharp.
|
how to do light painting photography
Step 1: Preparations - what you will need
Darkness (a dark room or from sunset to sunrise)
A lot of patience and patient friends/collegues
A camera (any camera will work but I recommend a digital SLR),
A video editing application to put it all together into a video sequence
Step 2: The basic principle
The basic principle when it comes to light painting is that you capture the light as it moves from one point in space and time to another. To do this you need to set your camera to full manual mode. Then you set the exposure time to at least a few seconds, we ended up using between 5 and 20 seconds depending how much we had going on in each frame.
To get a sharp image you will want to fix the camera to something, a decent tripod will get the job done. To avoid differences in focus set the focus manually and keep it set for each animation sequence (you can still adjust it manually as your subject moves / do a focus pull). another thing to try is to move the camera a tiny bit in one direction for each frame, in a straight line or rotationg around your subject, creating the illusion of camera motion.
An added bonus of using a still camera is the amazing image quality you can get even out of the most basic digital camera compared to a consumer video-camera, you could make your end video in full HD resolution.
Step 3: Trial & error
Stop motion animation involves taking a bunch of still frames and making an image sequence that appears to be moving in real time. Try drawing the outlines of an object or a person, you will get the best results by pointing the LED/flashlight in the direction of the camera lens at all times.
To create the illusion of motion try painting a part of the image at a time until you have a complete drawing. Another technique we used extensively was using people as placeholders (in our case the band members), and having them move slightly for each frame/shot to keep the continuity. If you or someone in your team has a talent for keeping track of where they have been drawing in the previous frames, go ahead and draw it freehand.
Make sure you preview your results every so often by flipping through the images you have shot for a sequence, using your cameras display will be the easiest way of doing it but transferring the images over to a computer and making video sequence will give you a more accurate idea of what the end result will be.
Another thing to try is to make regular time-lapse sequences and spice them up with some light painting.
Step 4:Putting it together
I used After Effects for creating video files of the images that were easy to work with in Final Cut Pro. These steps require that you have a basic understanding of how to use these applications, I'm sure other software could be used with a similar result.
- Import the images belonging to one sequence as an image sequence in After Effects.
- Create a composition with the resolution you would like to work with (I chose 1280x720)
- Add the image sequence to the composition and make adjustments to your likings (scale, color correction, change blending modes...)
- Render the composition to a format that is suitable for your video editing app of choice. I found that exporting to Apple ProRes 422 in 1280x720 worked flawlessly and the end video was virtually indistinguishable from the original jpeg stills (other than the lower resolution)
- Import the resulting video clips into your video editing software and get creative, sync up to a music piece or what ever you feel like.
Enjoy, and let me know if you have any questions or if you find this instructable helpful and make something of your own!
first response light painting
this my first response i did this by changing shutter speed to bulb and i changed the aperture to create this effect but to go for a detailed light painting need to hold the shutter for long until you are done drawing your light painting


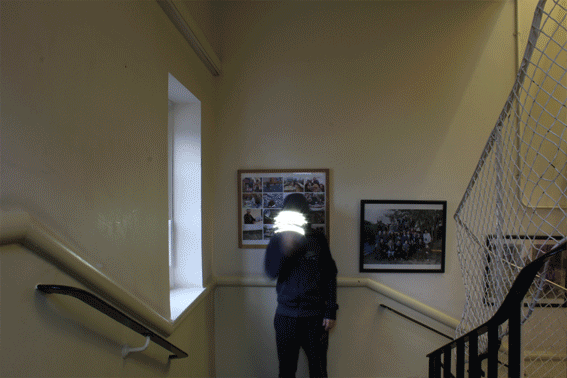
in this image i used the light painting technique to create a sense hidden identity where the light is acting as like a mask. i made sure than there wasnt to wide of a frame because it would take away the importance of the light painting as there would be more focus on the background. also i took the photo in bright light which is unusual as it mostly in dark conditions but this was because it would allow the camera to pick up more details rather than just the light painting for example you can clearly see the outline and the clothes he is wearing
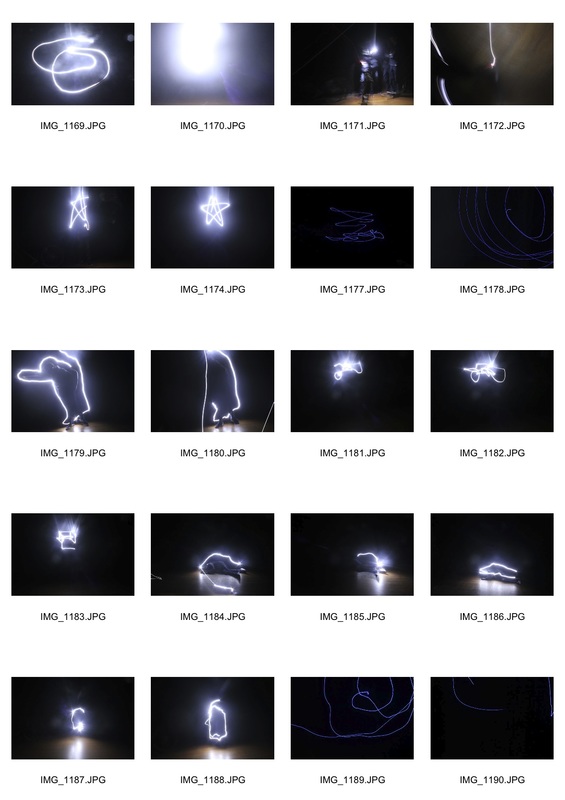
these images show my creativity through light painting as i work on creating more patterns and shapes to make a more controlled image also i focused on keeping the main part of the image in the centre to allow the viewers eye to be be drawn to the white light as the darkness takes over the space around it.
WWW and EBI
WWW= i demonstrated the technique of light painting clearly
EBI= i added a diffrent set of colours than just white to create a more interesting image
EBI= i added a diffrent set of colours than just white to create a more interesting image
this is light painting combined with a gif which i learnt in previous lesson this is taking one light painting then doing another light painting and combine together to creat gif
2nd response to light painting
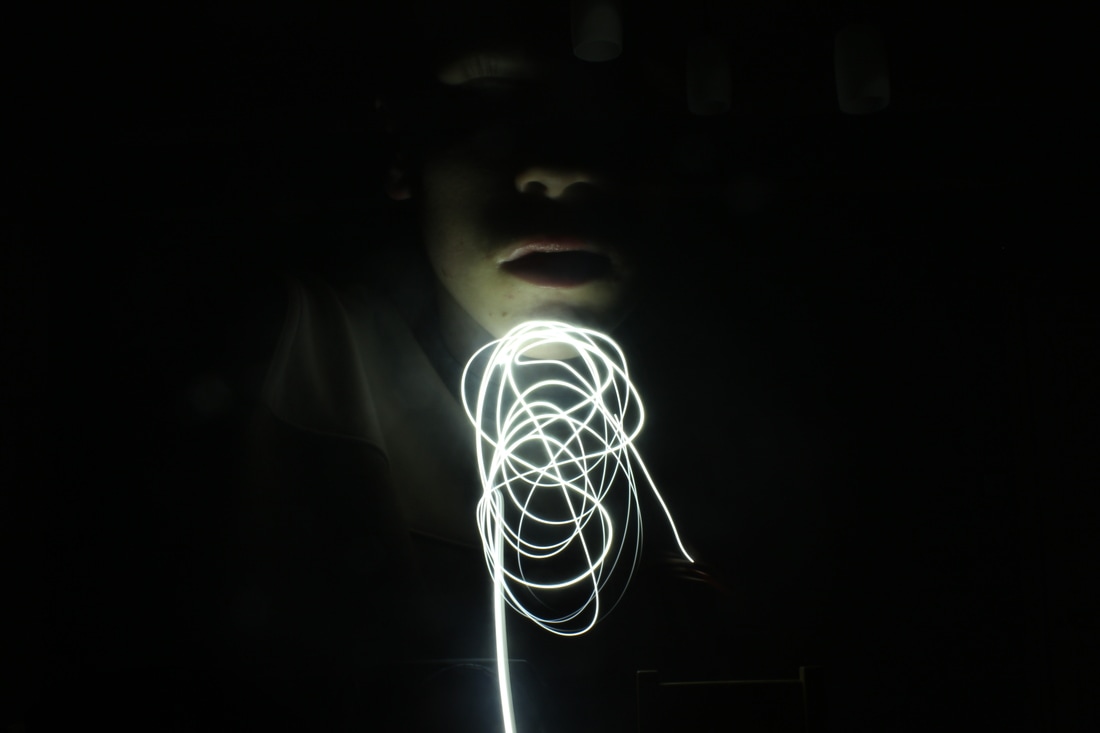
this image combines the GIFF technique with light painting to create a nice picture. also i choose to clour his face in with light painting to create a sense of hidden identity and to make the image more unusual.
|

|

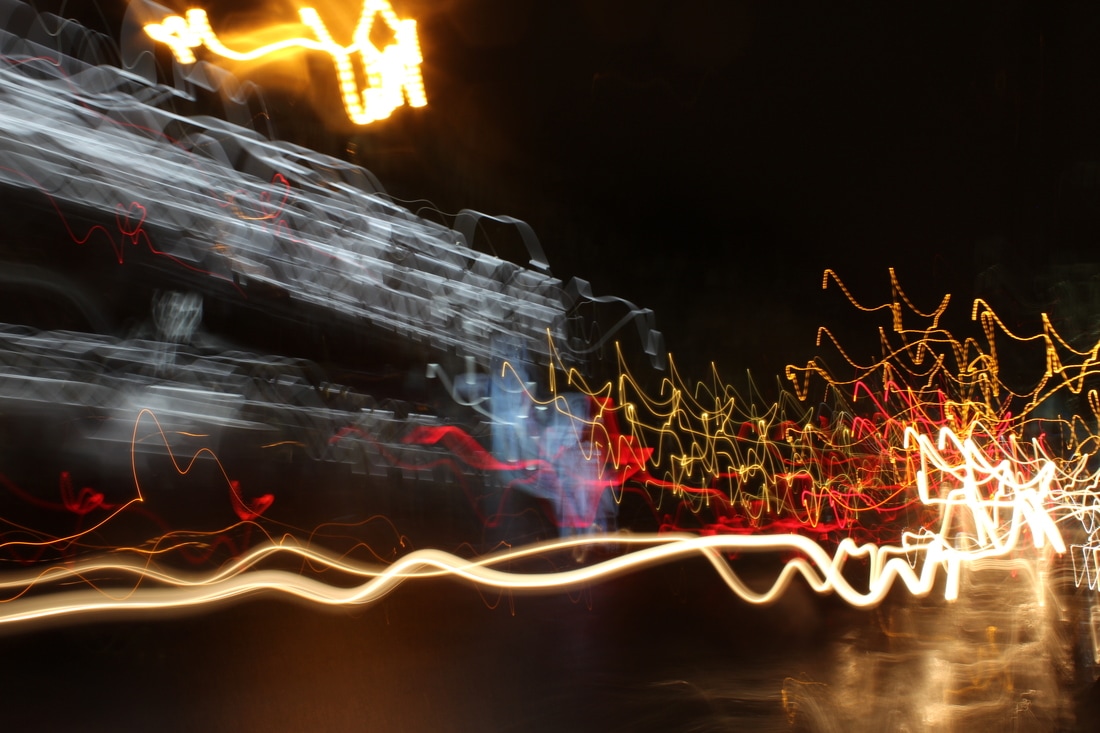
this image was taken in central london during night i chose this area because the city is usually very busy with many lights so this meant i could have multiple light painting rather than one main focus.i chose a dark light because this was the best time of the day to capture light painting and if was in day time there would be many different backgroud images taking away the importance of the light painting. the strong bright white line coming across was the main focus this was produced by car driving past with there lights on. the only real problem was that it was bit blurry due not having access to a tripod
final piece
in these final piece image i decided to explore more photos of light painting rather than the zoom blur technique as i believe there was more abstract,interesting and exciting ideas. whereas with zoom blur occasionally i would begin to struggle with the technique there for wouldnt produce as many quality photos.

this image was taken in central london to capture the chaos within the city. for example in this image i stood very close to be in the road so the car that was going at a fast pace would be the focus of the image and also emphasize the technique of light painting as the white light it very bright. i also focused on not letting image be a wide scale as i wanted the main focus to be on the light painting from the car
|
|
|

|
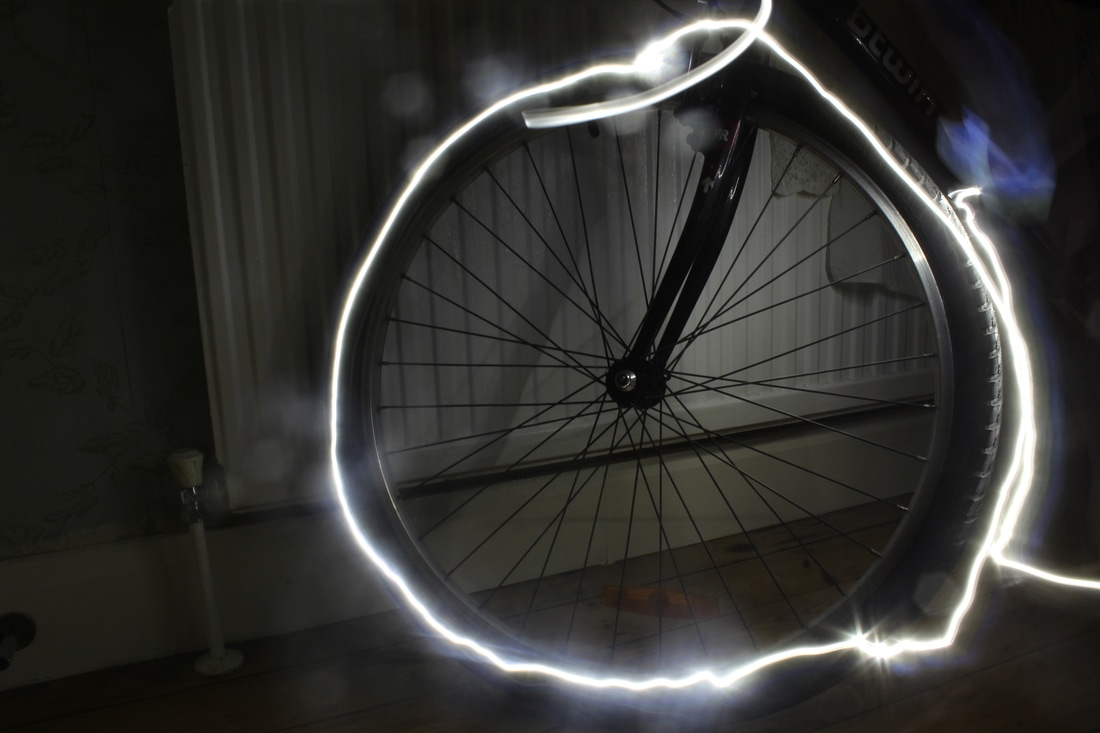
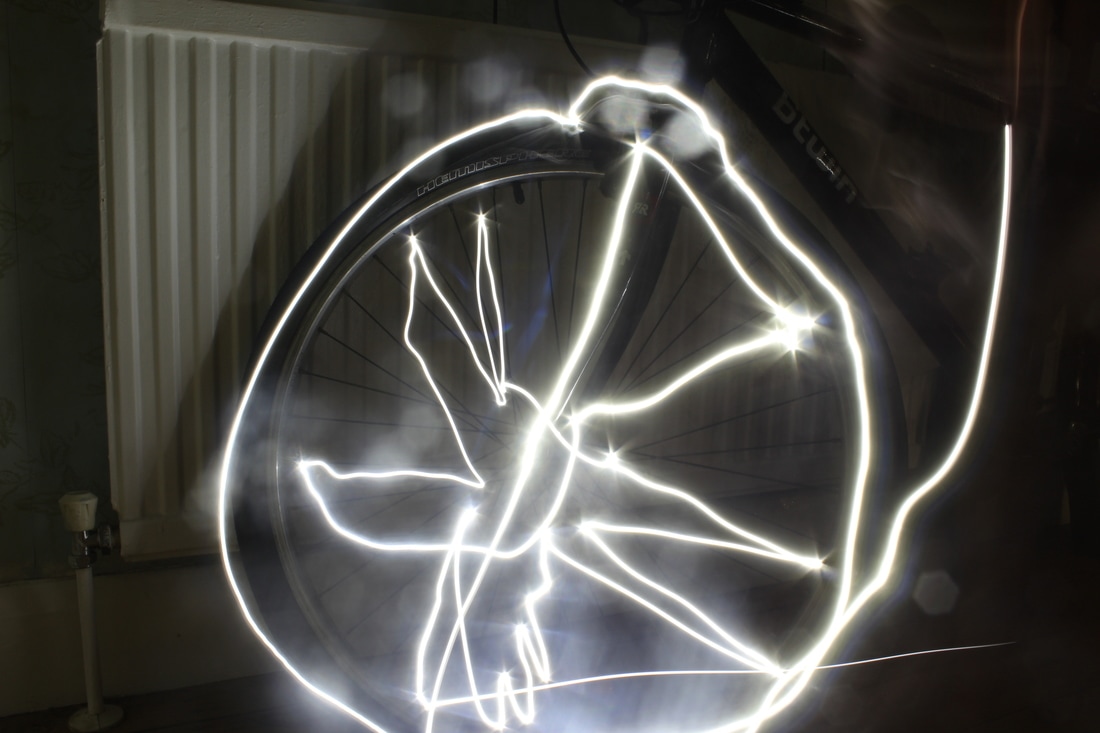
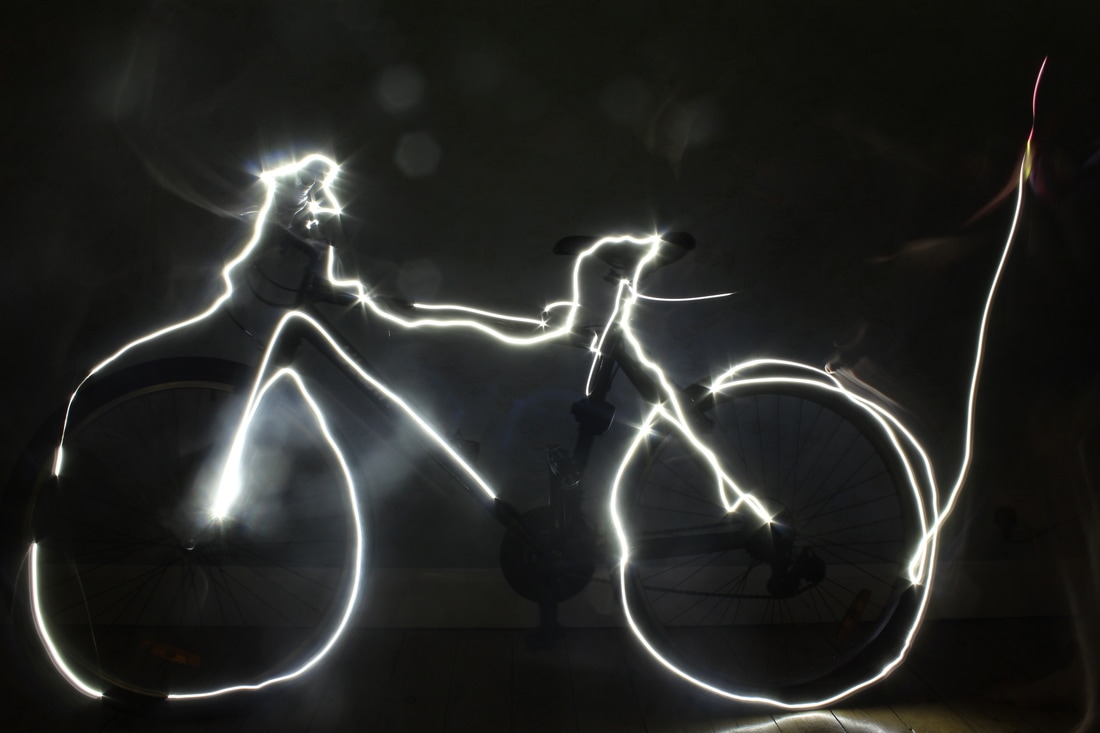
these images show the clear technique of light painting where i used my light to draw a bike and create a effect image due to the patterns demonstrated. this image was inspired by Basanko where he also does light painting of a bike but with mine i mainly focus on having a shore view rather than a wide view to concentrate on the bike rather than background details. Furthermore to furfil this i also made sure the background which is a plain wall emphasize the importance of keeping image focused on the bike and the patterns created.i drew out the bike by having the camera on a slow shutter speed to allow enough time to draw the light painting . the contrast between the black frame of rhe bike and white light painting bike creates a interesting. the composition of the image was correctly place the light painting the centre of the frame to achieve that there was no negative space due to the whole fram being filled by the light painting.

|
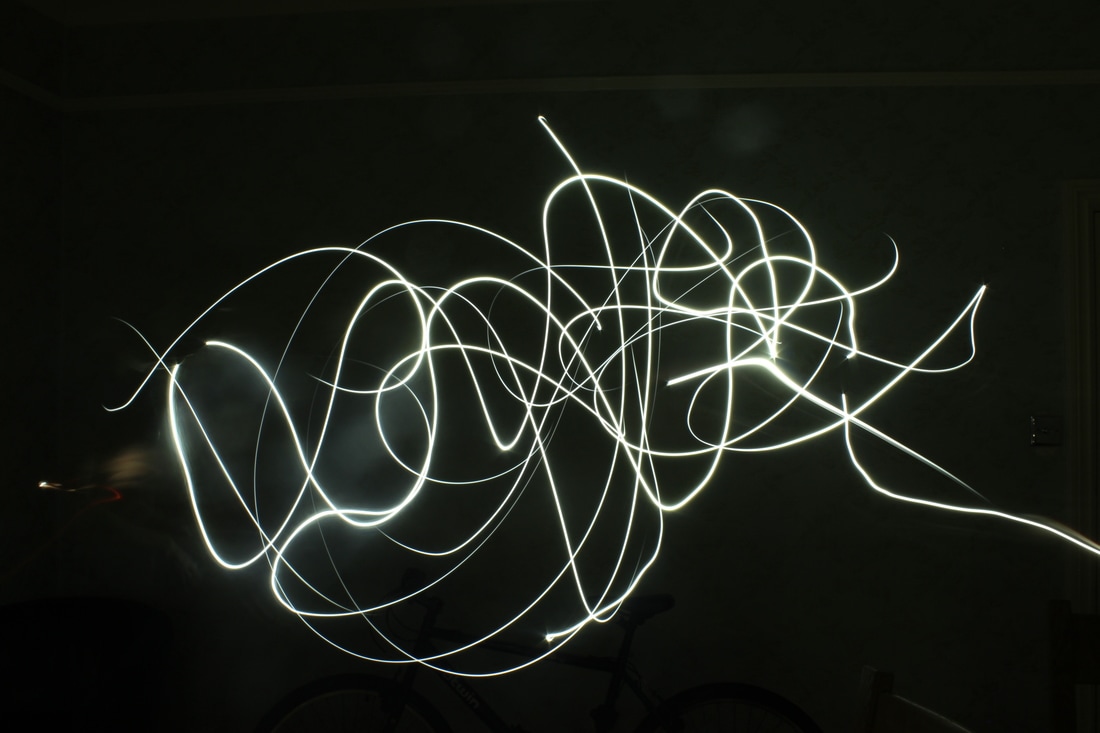
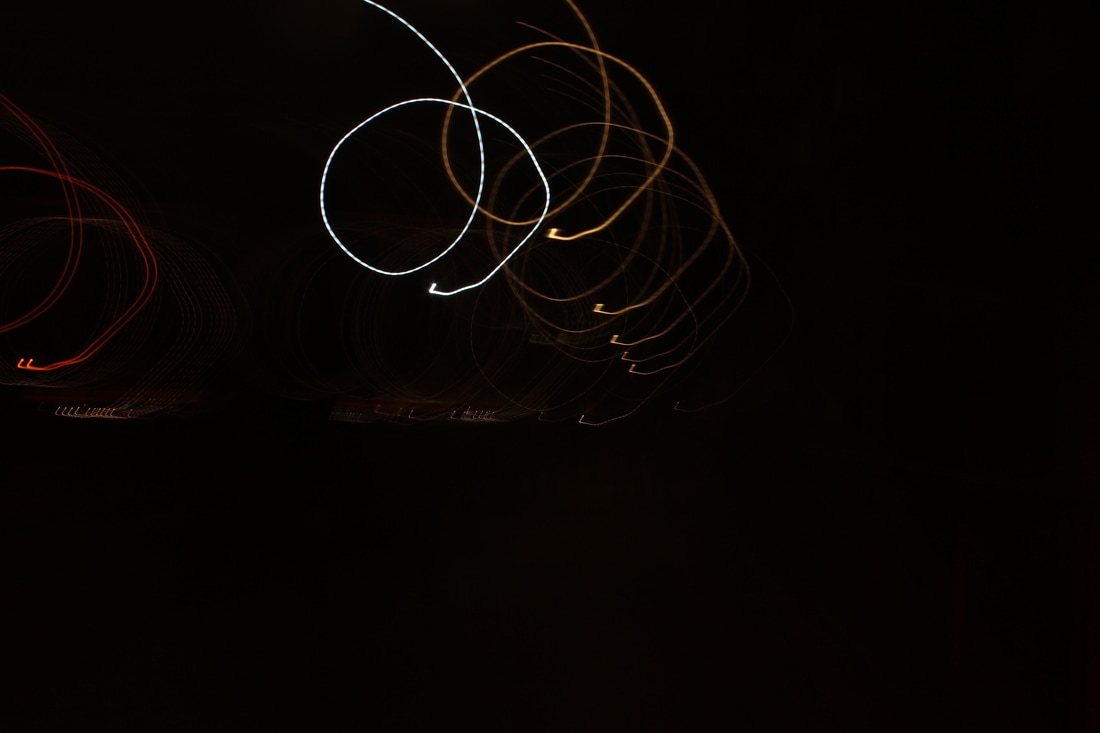
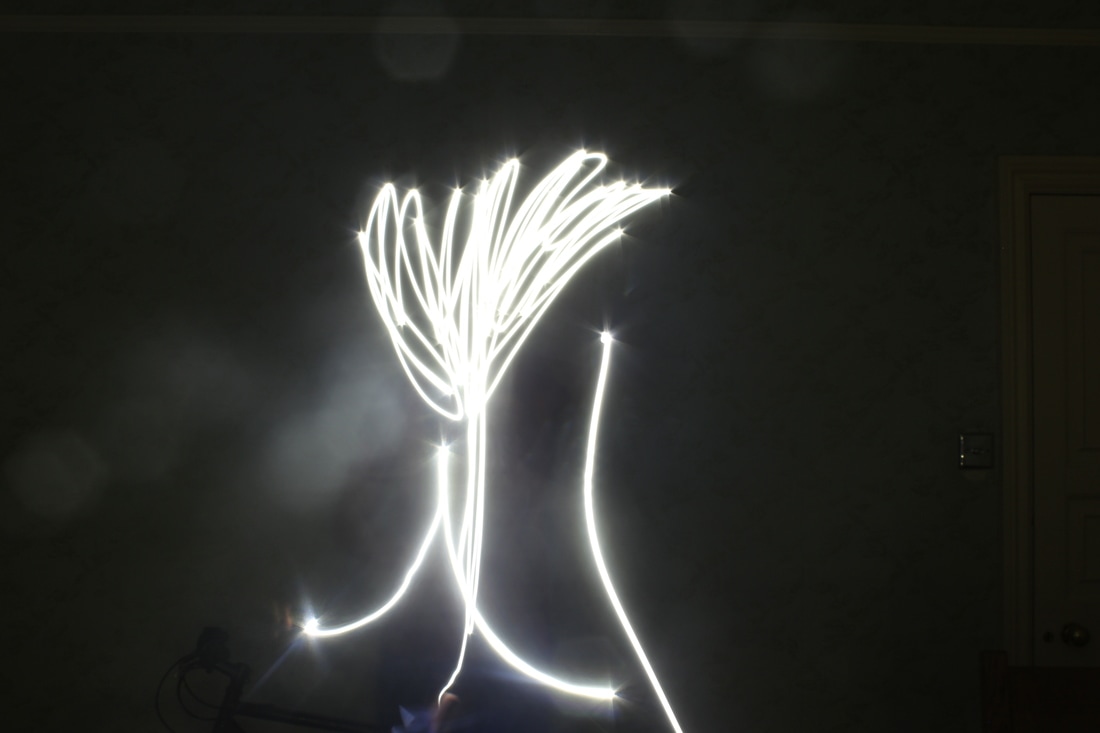
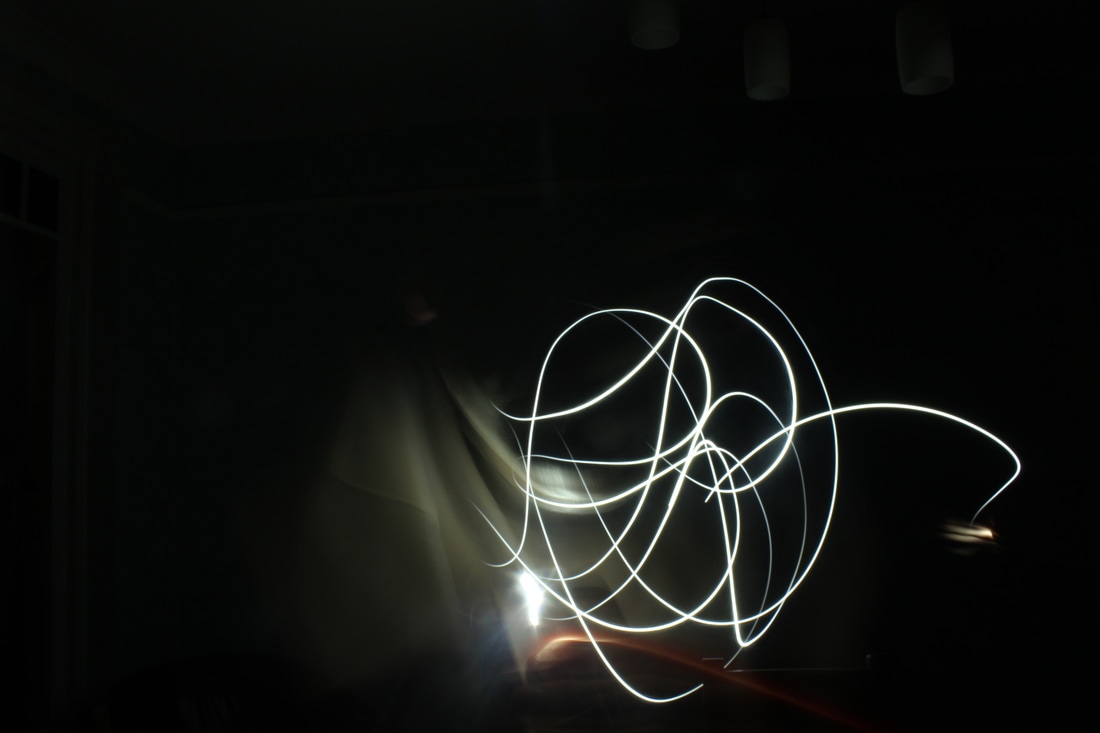
this demonstrates light painting as i randomly paint shapes and curves to create a abstract image. this shows the uncontrolled imagery of the light as it as if its moved freely in any direction this gives ideas of caos.
|
|
|
|
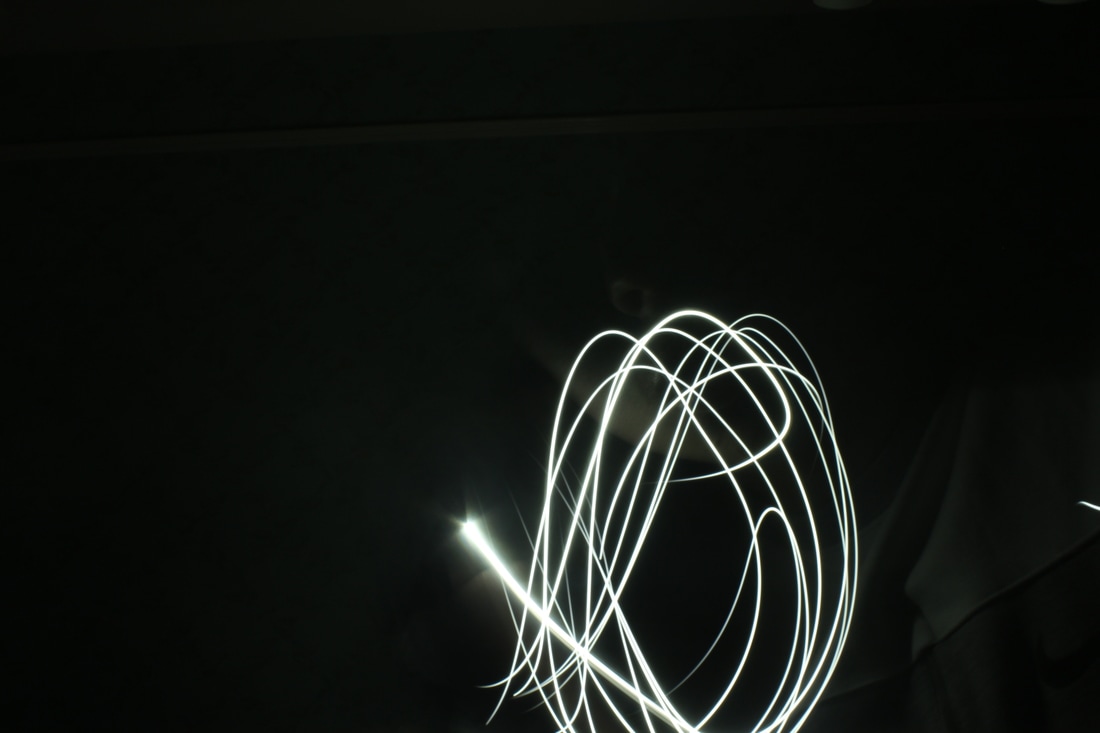
|
these images show the light painting method as i set the shutter speed to 15 to allow me to have enough time to paint the images presented above. this compares to the work of Michael Bossanko where i created swirls of light painting which i was inspired from michael Bosanko. the dark lighting contrasts to the main subject of the light painting which creates a interesting image. this therefore creates the light painting to be the main focus of the image with the black background making the image balanced which right amount of light painting and right amount of the plain black background.
